
Microsoft AD FS - SAML
Learn how to configure Microsoft AD FS as a SAML identity provider for secure single sign-on (SSO) with your application.
This guide walks you through configuring Single Sign-On (SSO) with Microsoft Active Directory Federation Services (AD FS) as your Identity Provider.
Before you begin
Section titled “Before you begin”To successfully set up AD FS SAML integration, you’ll need:
- Elevated access to your AD FS Management Console
- Access to the Admin Portal of the application you’re integrating Microsoft AD FS with
Configuration steps
Section titled “Configuration steps”-
Begin the configuration
Section titled “Begin the configuration”Choose Microsoft AD FS as your identity provider
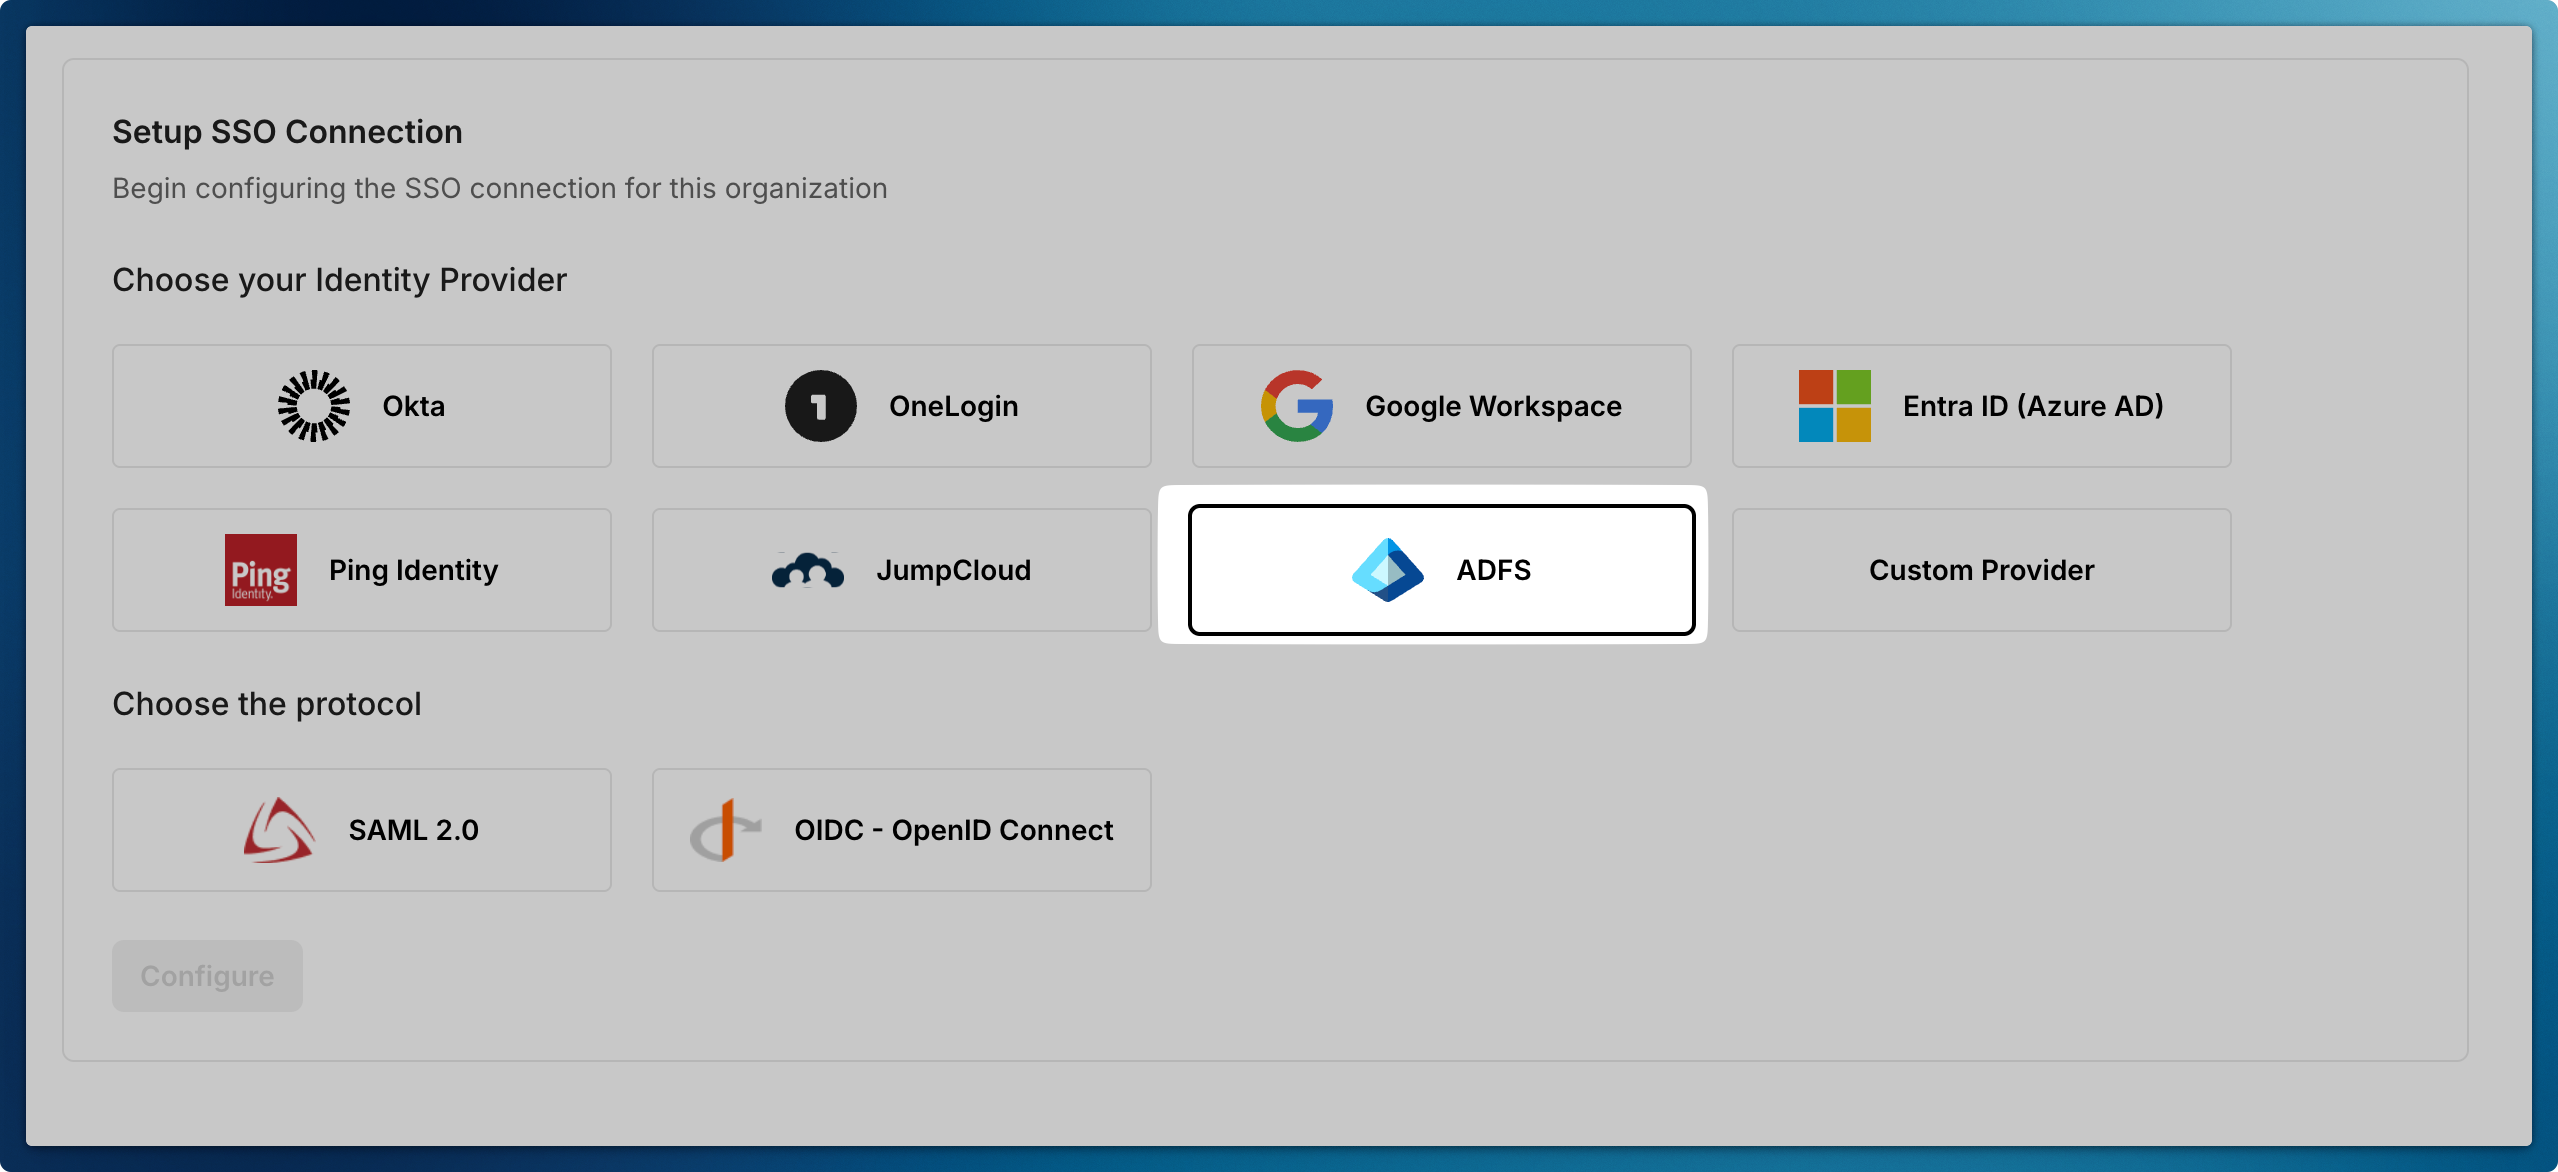
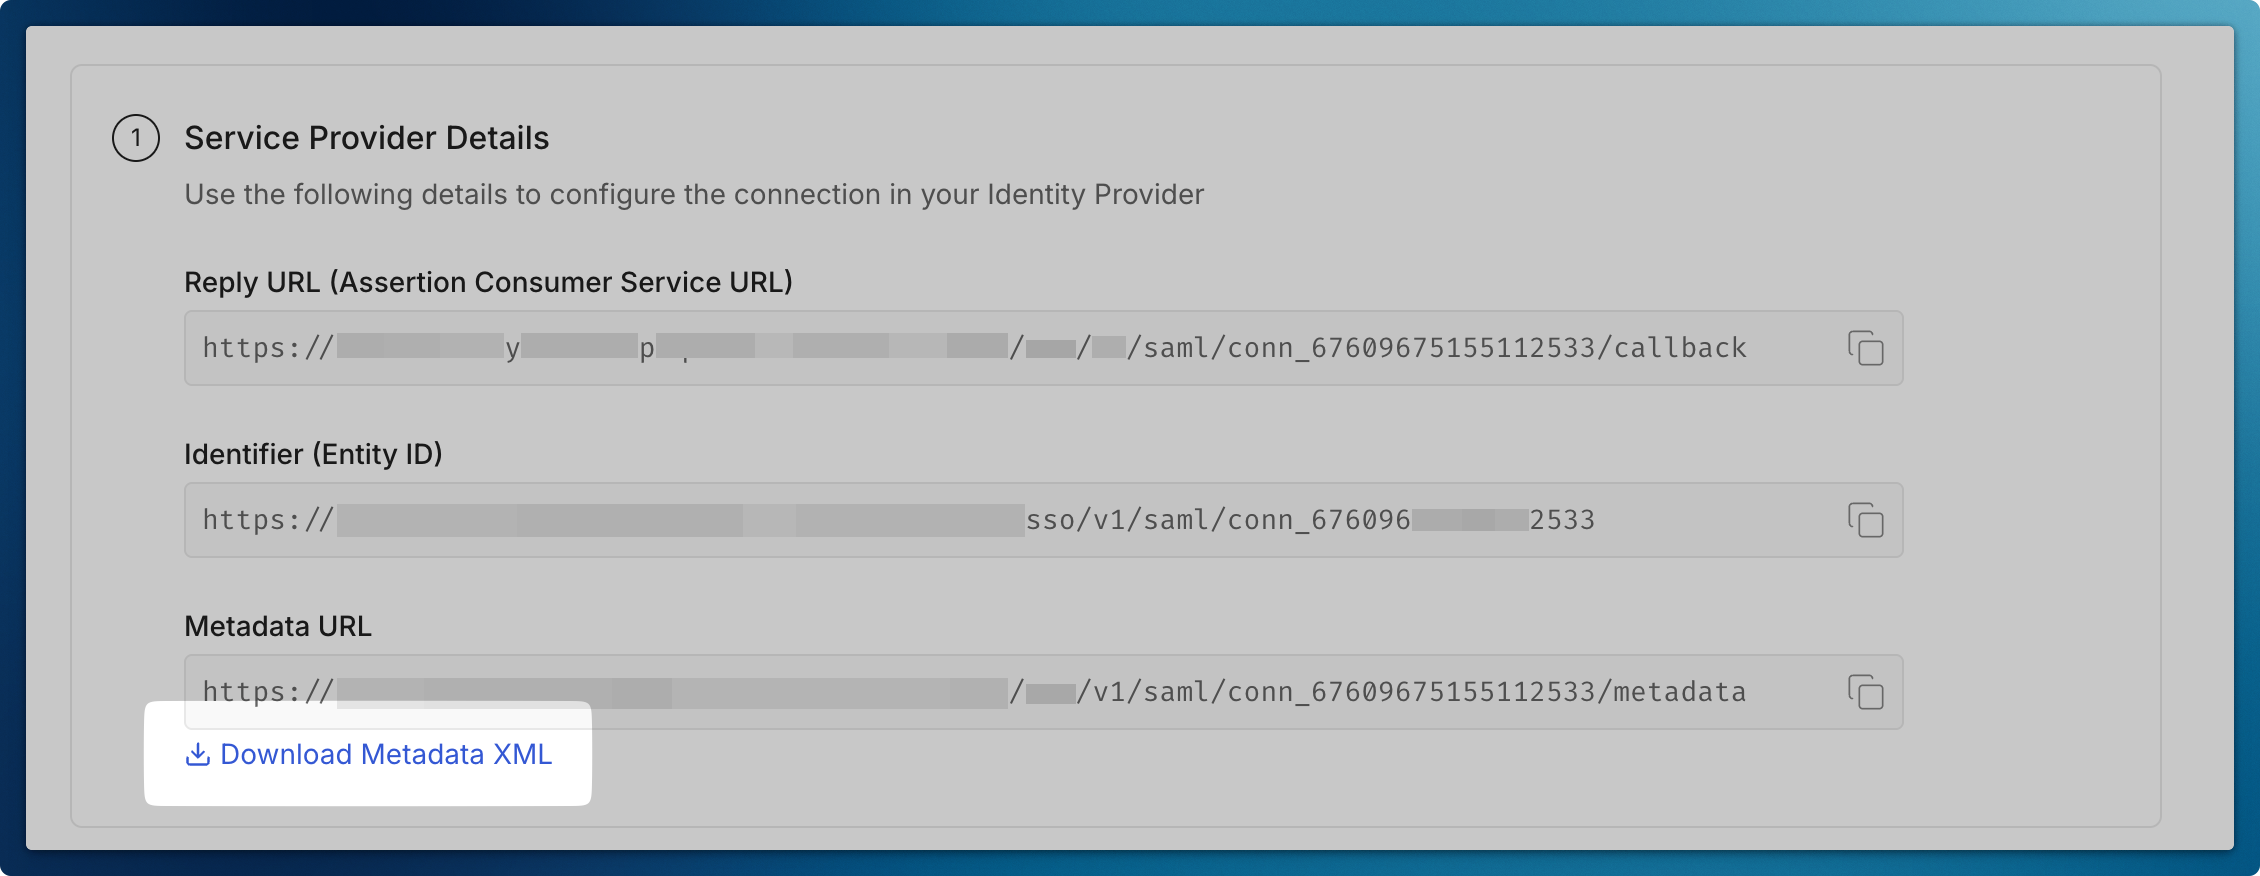
Download Metadata XML file so that you can configure AD FS Server going forward
-
Open AD FS Management Console
Section titled “Open AD FS Management Console”- Launch Server Manager
- Click ‘Tools’ in the top menu
- Select ‘AD FS Management’
-
Create a Relying Party Trust
Section titled “Create a Relying Party Trust”- In the left navigation pane, expand ‘Trust Relationships’
- Right-click ‘Relying Party Trusts’
- Select ‘Add Relying Party Trust’
- Click ‘Start’ to begin the configuration

-
Configure Trust Settings
Section titled “Configure Trust Settings”- Select ‘Claims aware’ as the trust type
- Choose ‘Import data about the relying party from a file’
- Click ‘Next’ to proceed
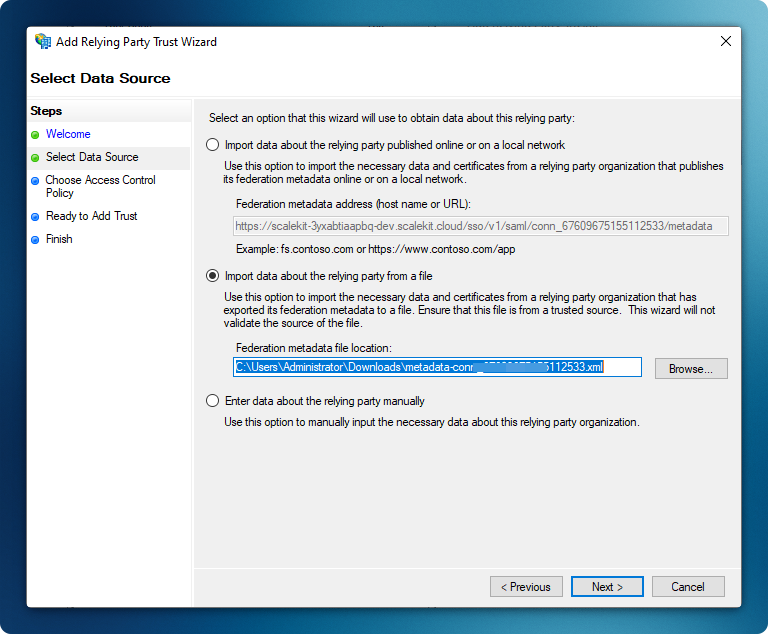
Import the Metadata XML file that you downloaded earlier
-
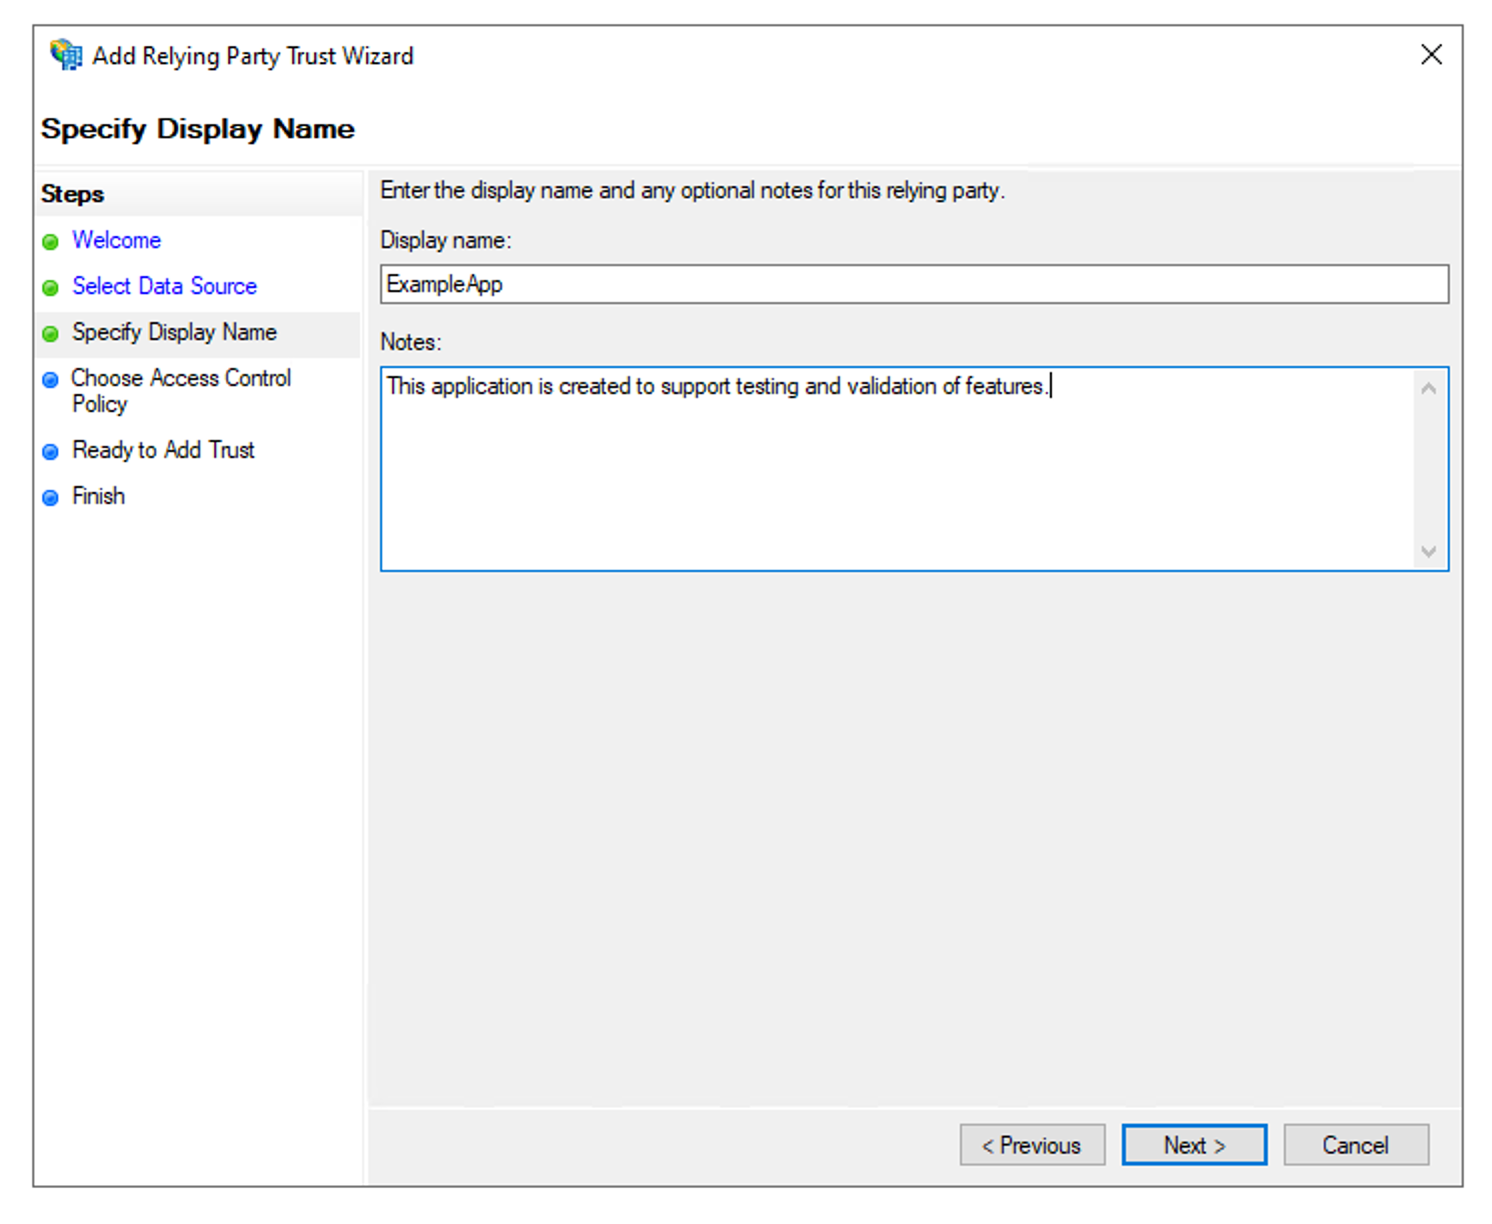
Set Display Name
Section titled “Set Display Name”- Enter a descriptive name for your application (e.g., “ExampleApp”)
- Click ‘Next’ to continue
-
Configure Access Control
Section titled “Configure Access Control”- Select an appropriate access control policy
- For purposes of this guide, select ‘Permit everyone’
- Click ‘Next’ to proceed
-
Review Trust Configuration
Section titled “Review Trust Configuration”- Verify the following settings:
- Monitoring configuration
- Endpoints
- Encryption settings
- Click ‘Next’ to continue
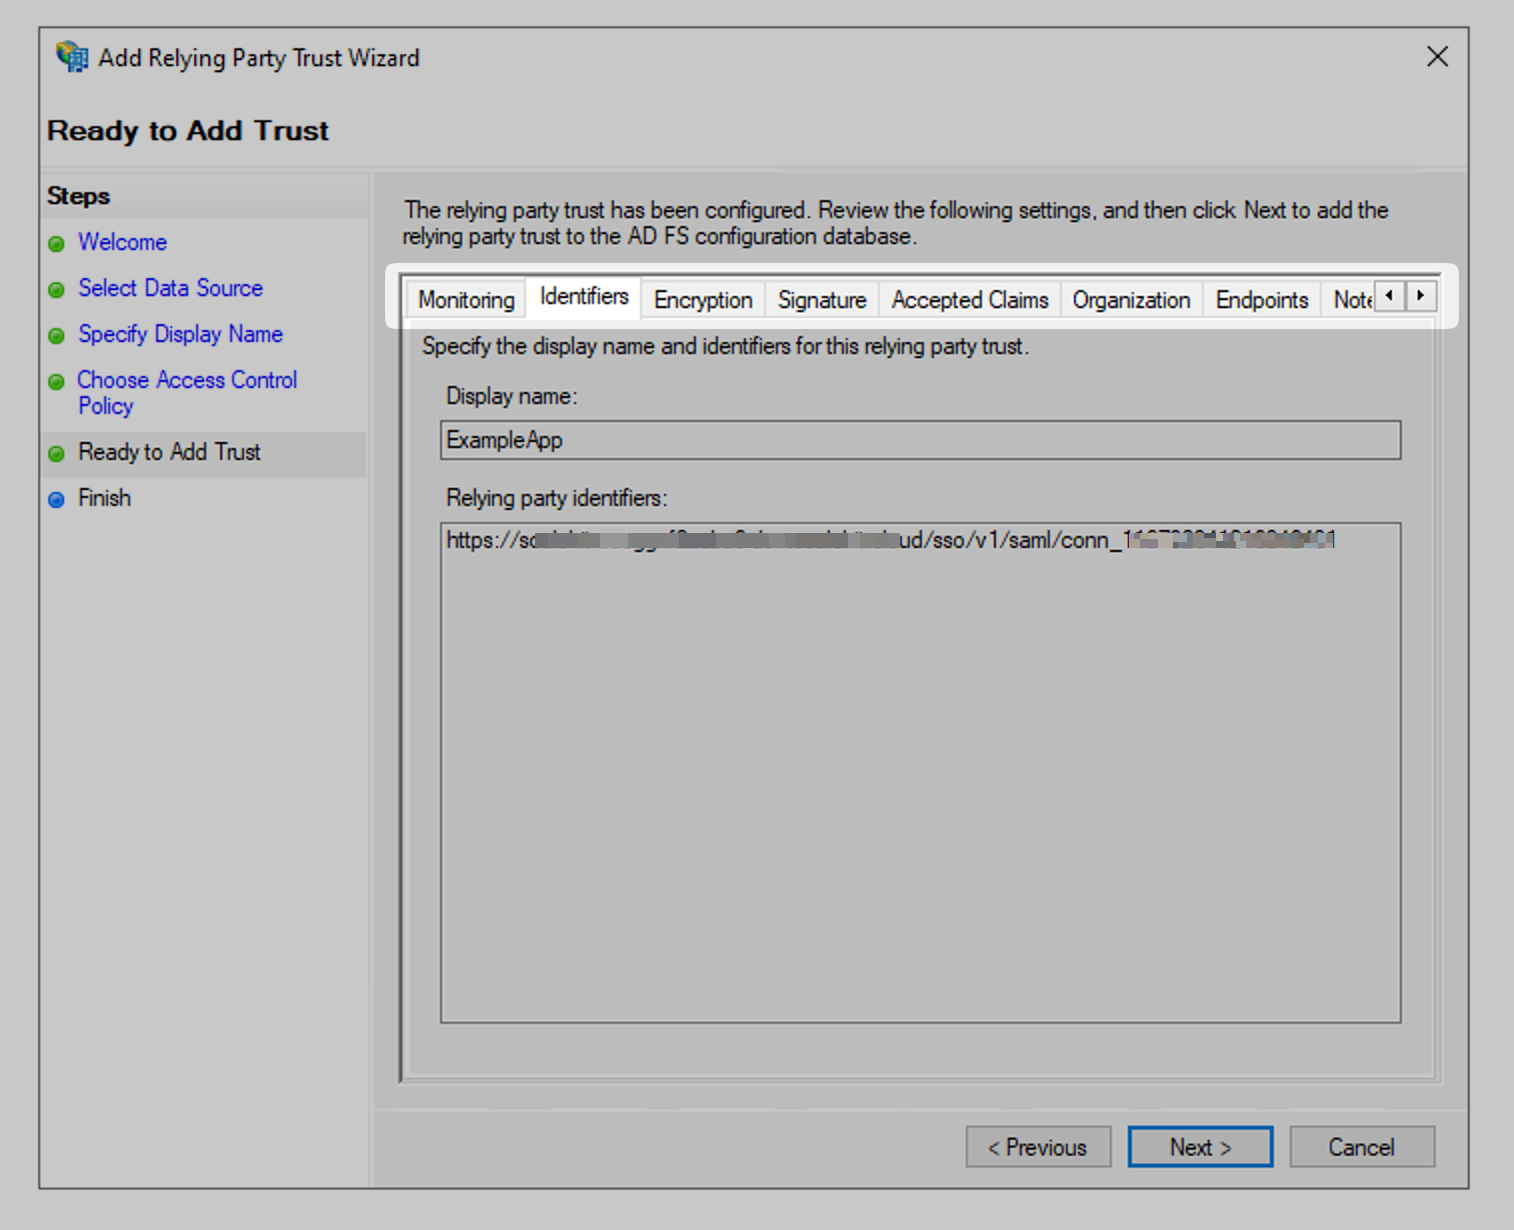
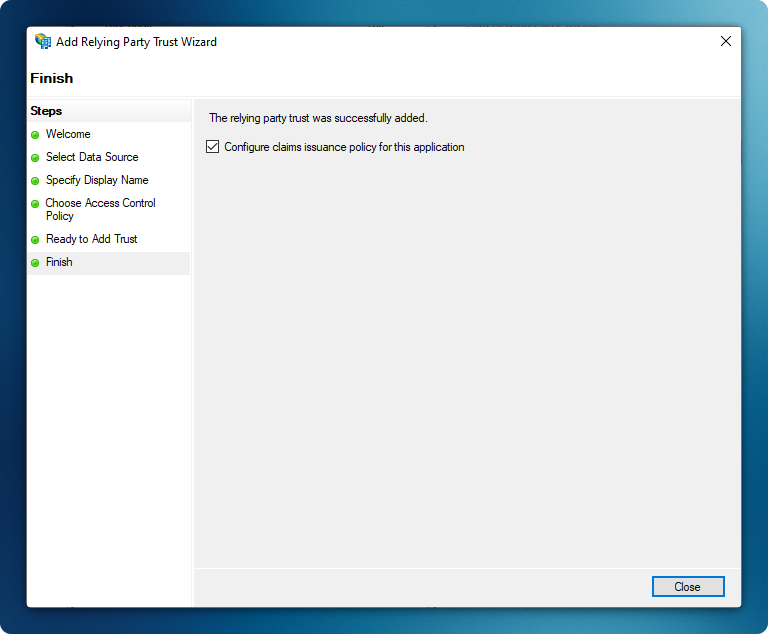
The wizard will complete with the ‘Configure claims issuance policy for this application’ option automatically selected
- Verify the following settings:
-
Create claim rule
Section titled “Create claim rule”Navigate to ‘Relying Party Trusts’ and select recently created app. Then click on ‘Edit Claim Issuance Policy’ from right nav bar.
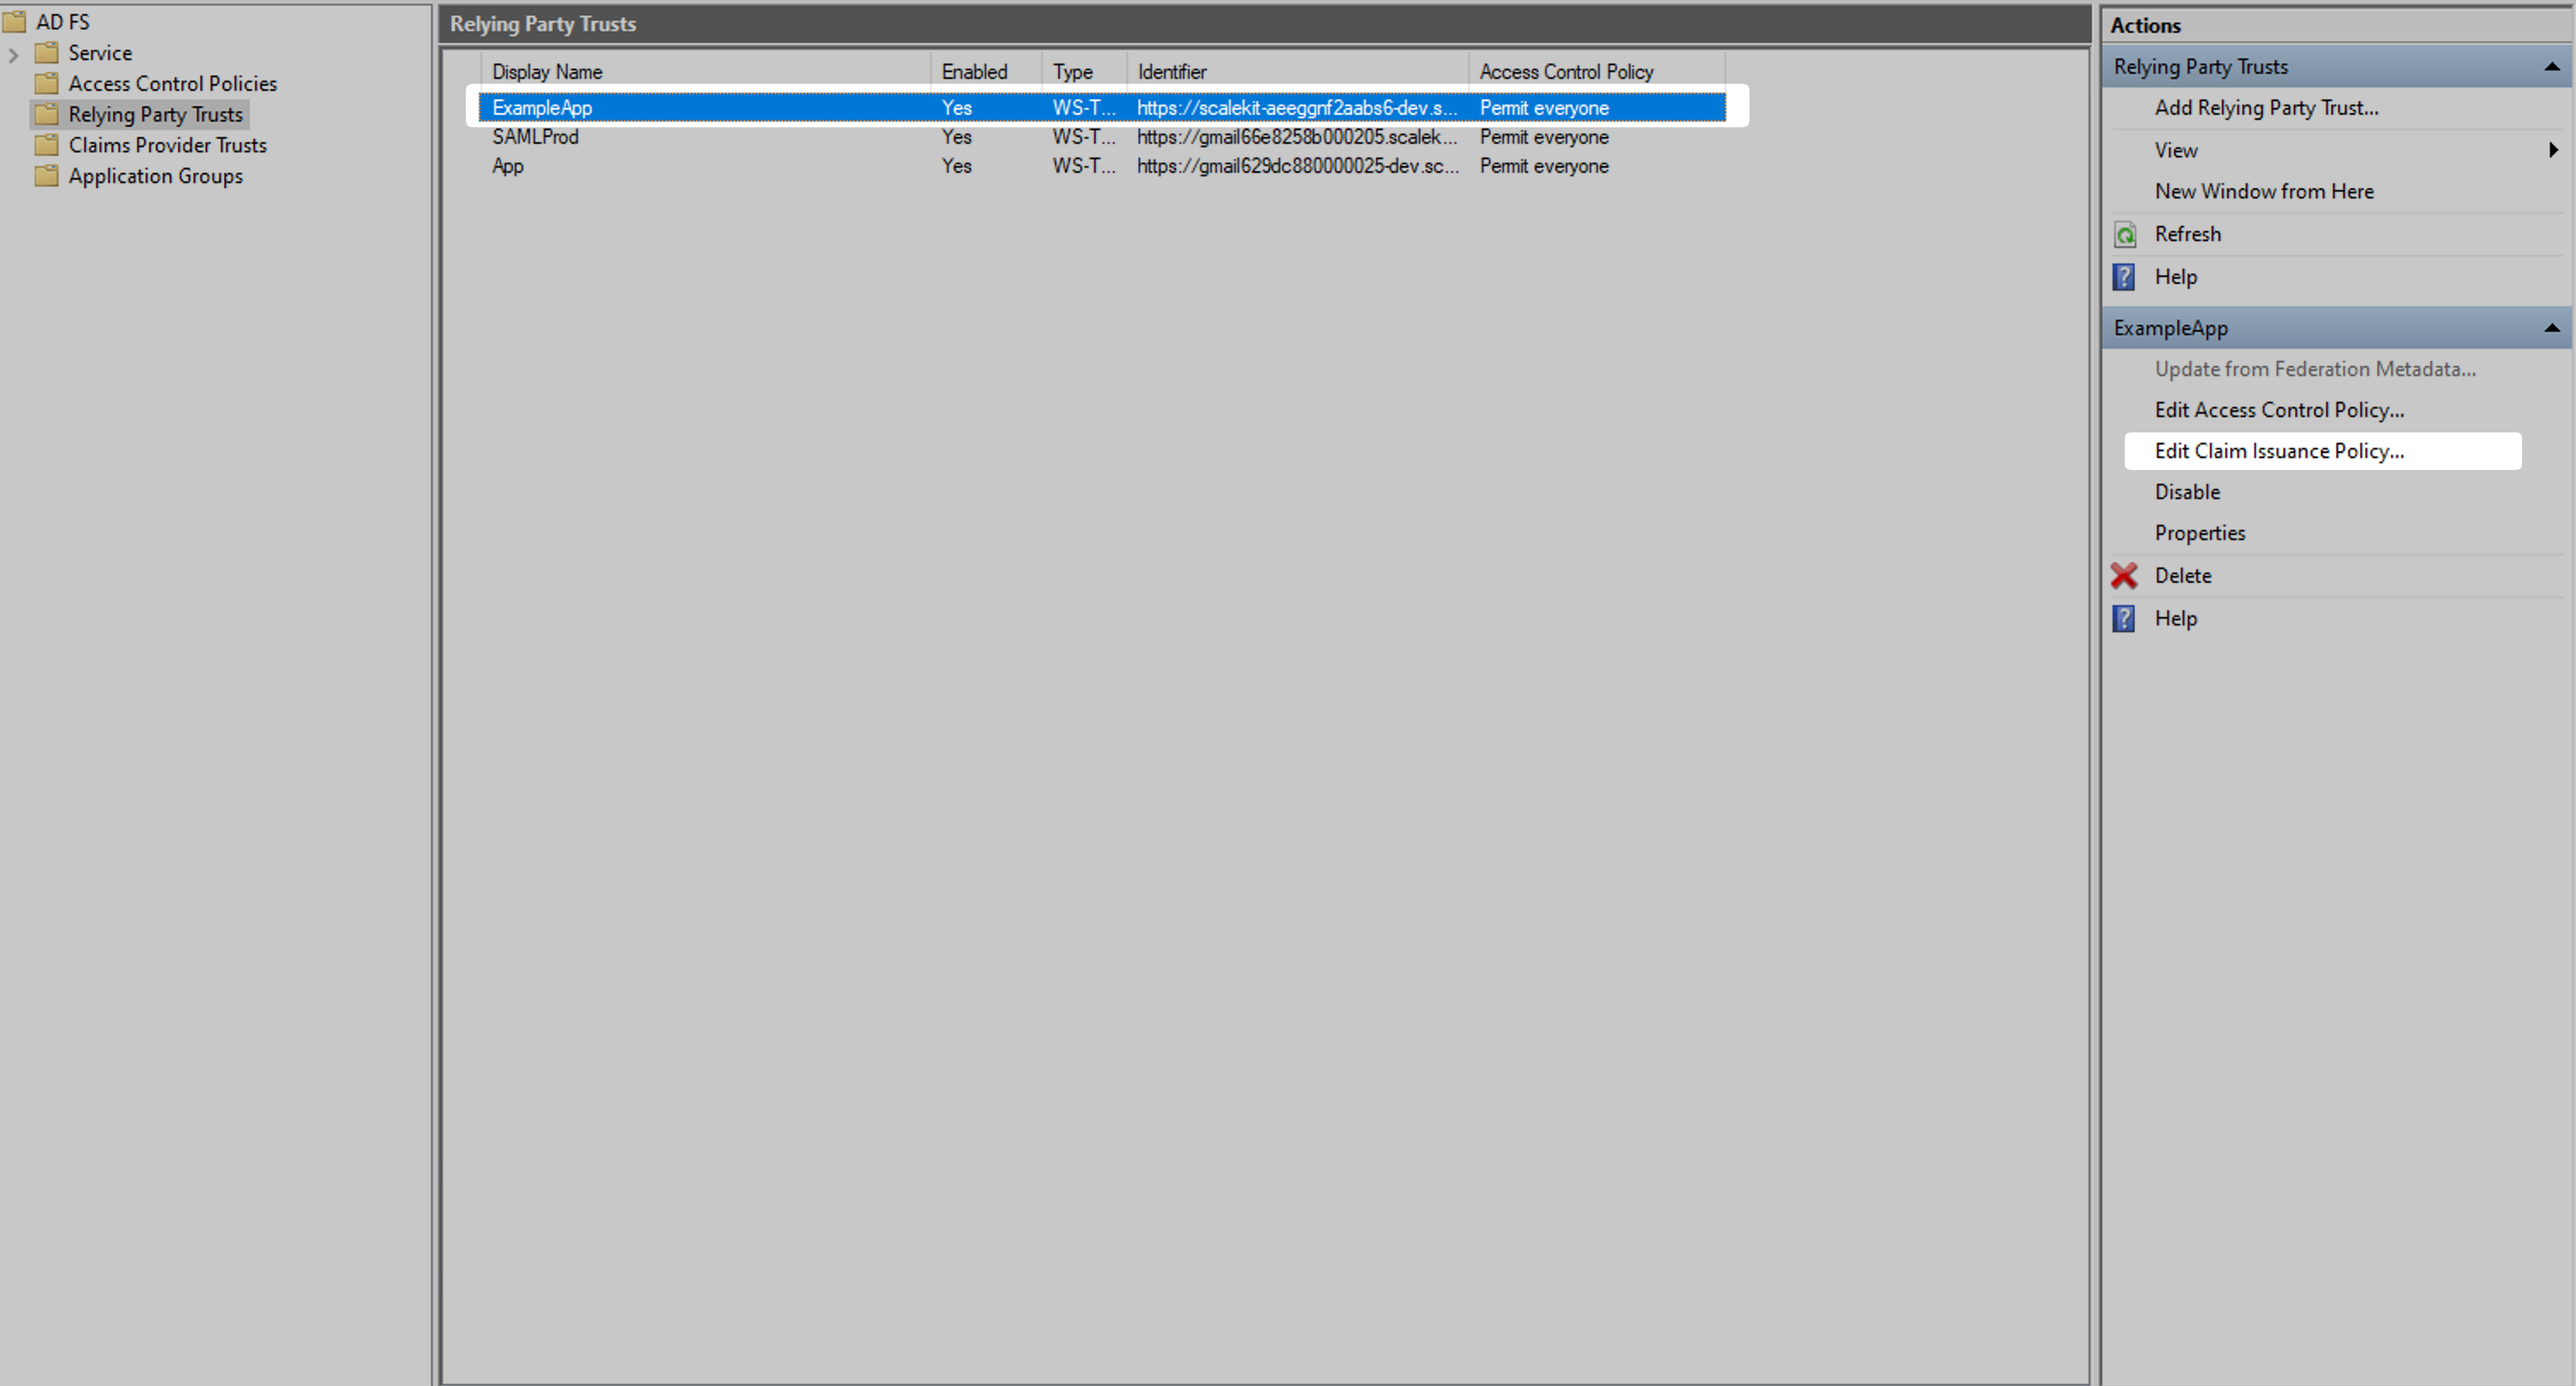
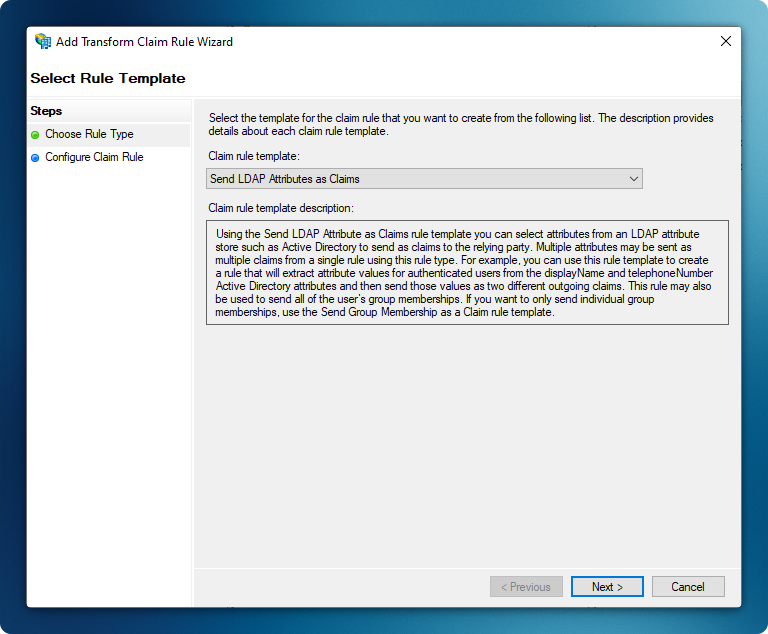
Click ‘Add Rule’ to create a new claim rule
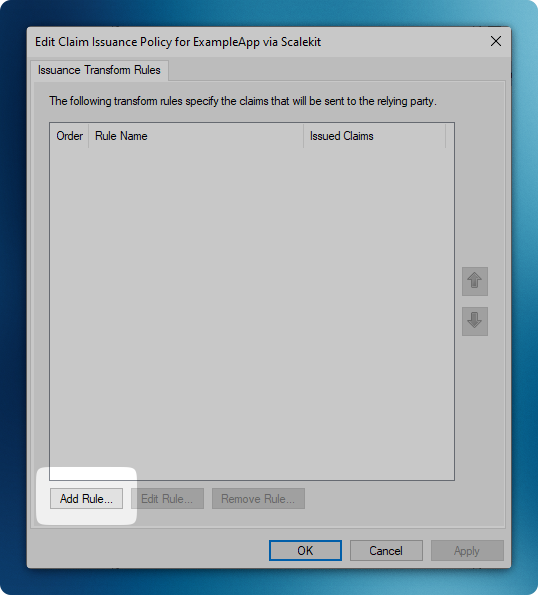
Select ‘Send LDAP Attributes as Claims’ template
-
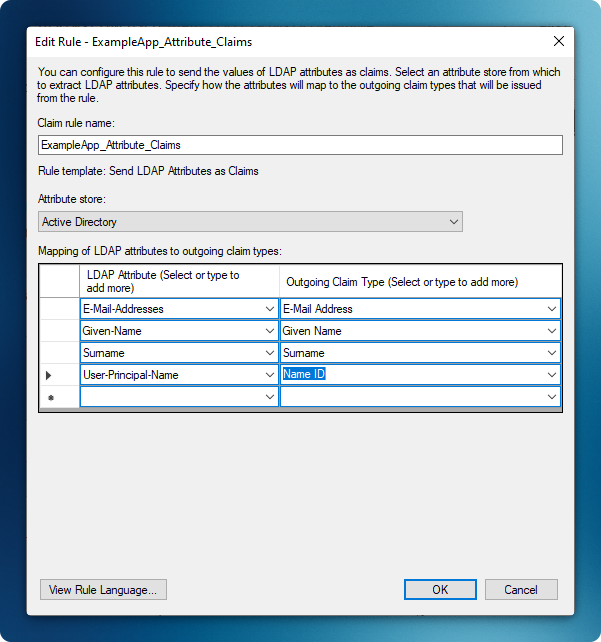
Map User Attributes
Section titled “Map User Attributes”- Enter a descriptive rule name (e.g., “Example App”)
- Configure the following attribute mappings:
E-Mail-Addresses→ E-Mail AddressGiven-Name→ Given NameSurname→ SurnameUser-Principal-Name→ Name ID
- Click ‘Finish’ to complete the mapping
-
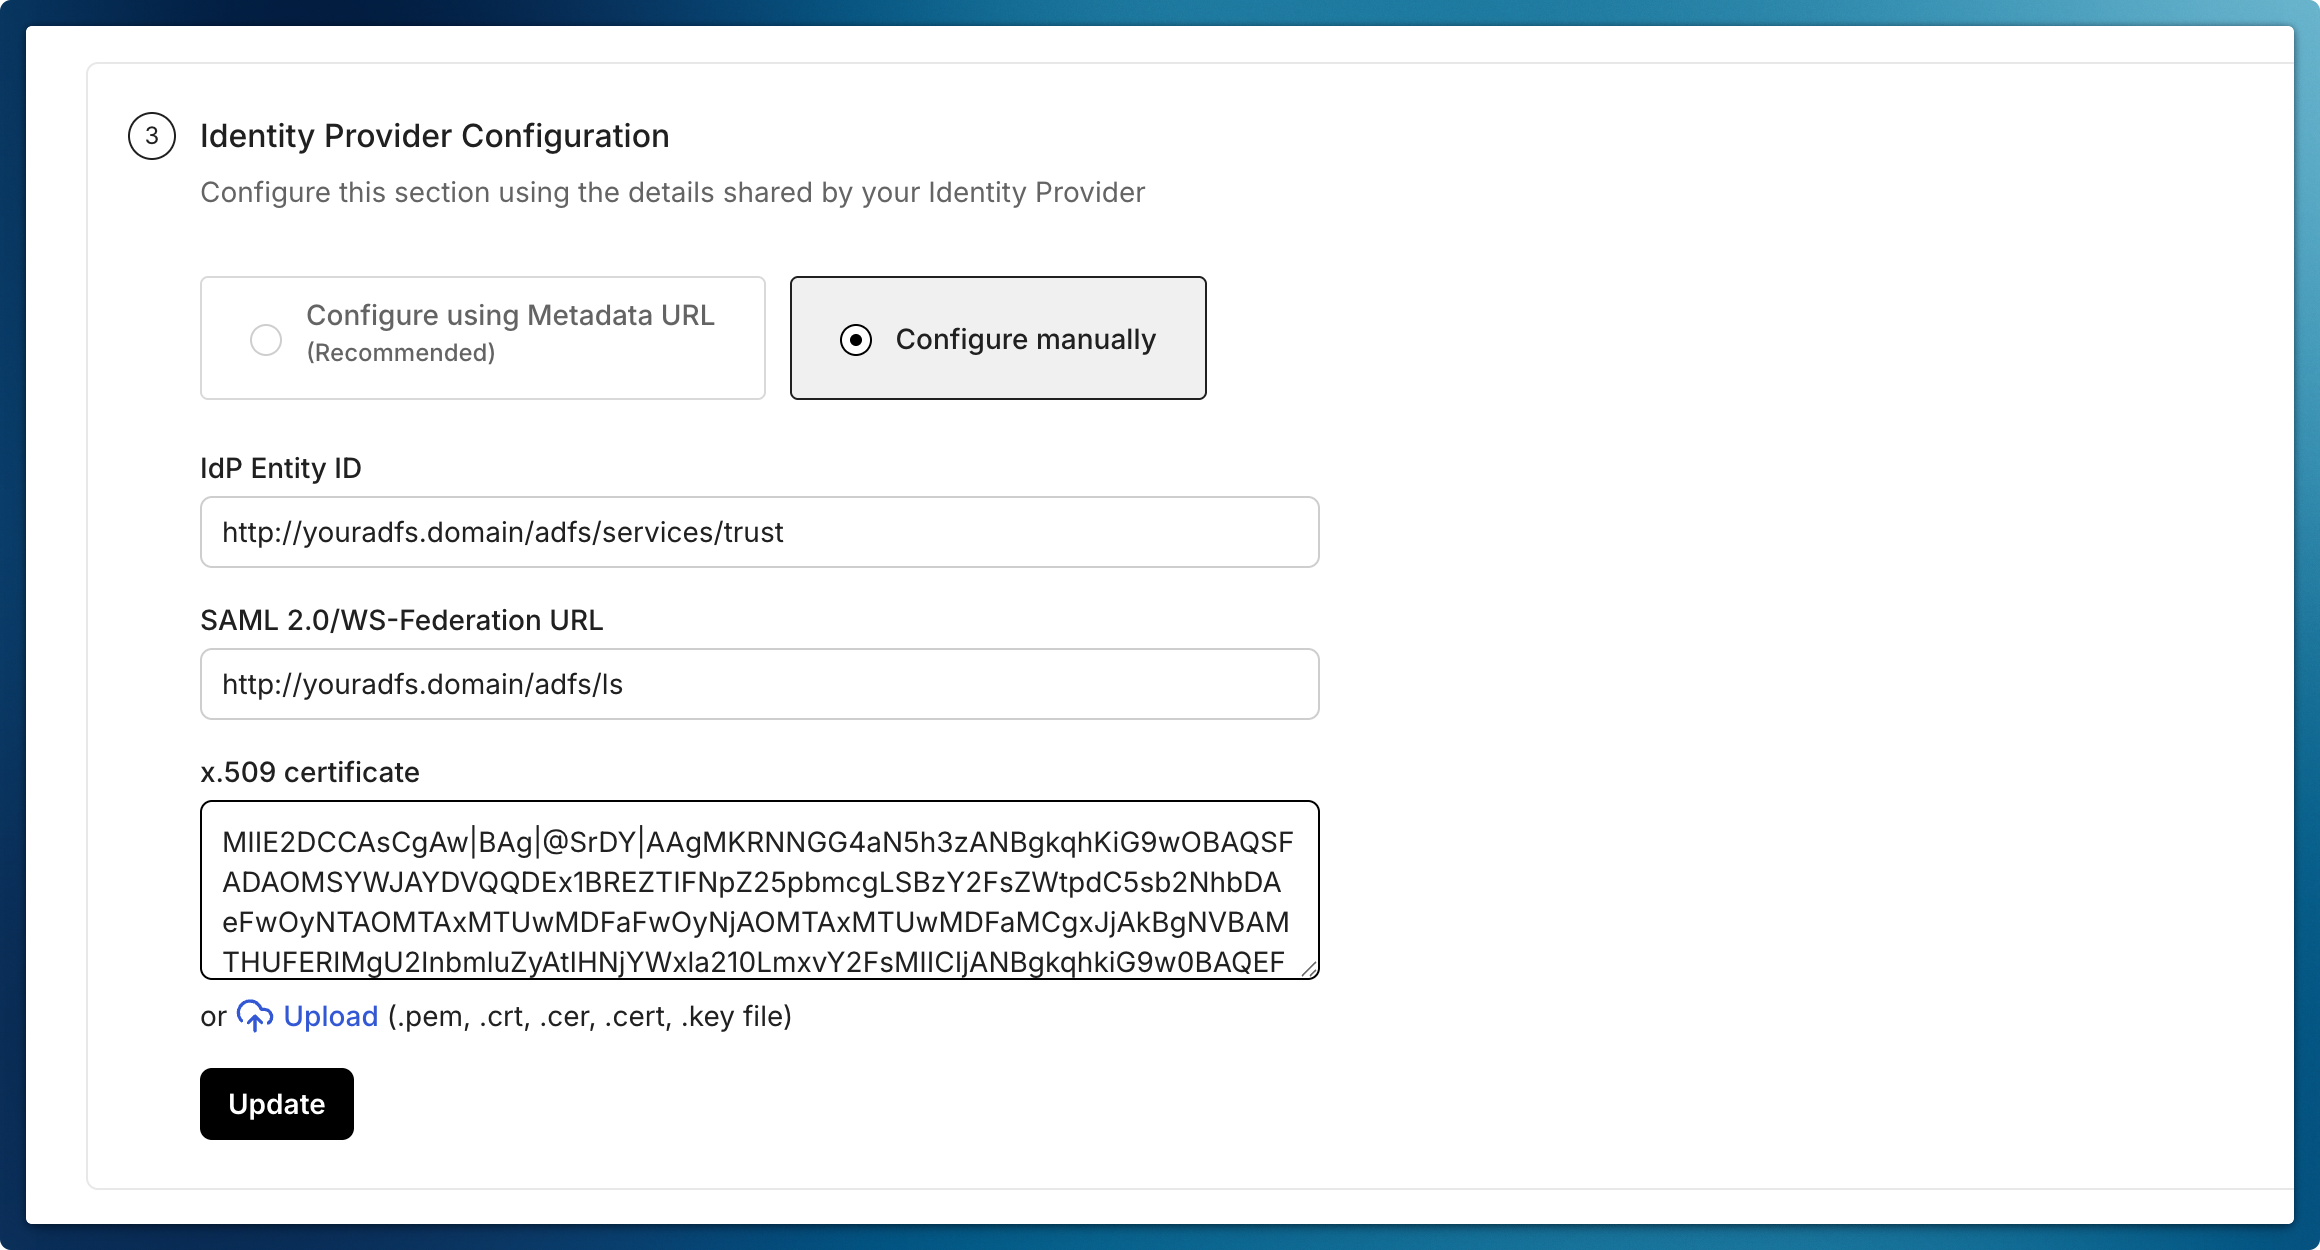
Complete Admin Portal Configuration
Section titled “Complete Admin Portal Configuration”- Navigate to Identity Provider Configuration in the Admin Portal
- Select “Configure Manually”
- The above endpoints are AD FS endpoints. You can find them listed in AD FS Console > Service > Endpoints > Tokens and Metadata sections. Enter these required details:
- Microsoft AD FS Identifier:
http://<your-adfs-server-domain>/adfs/services/trust - Login URL:
http://<your-adfs-server-domain>/adfs/ls - Certificate:
- Access Federation Metadata URL
- Locate the text after the first
X509Certificatetag - Copy and paste this certificate into the “Certificate” field
- Microsoft AD FS Identifier:
- Click “Update” to save the configuration
-
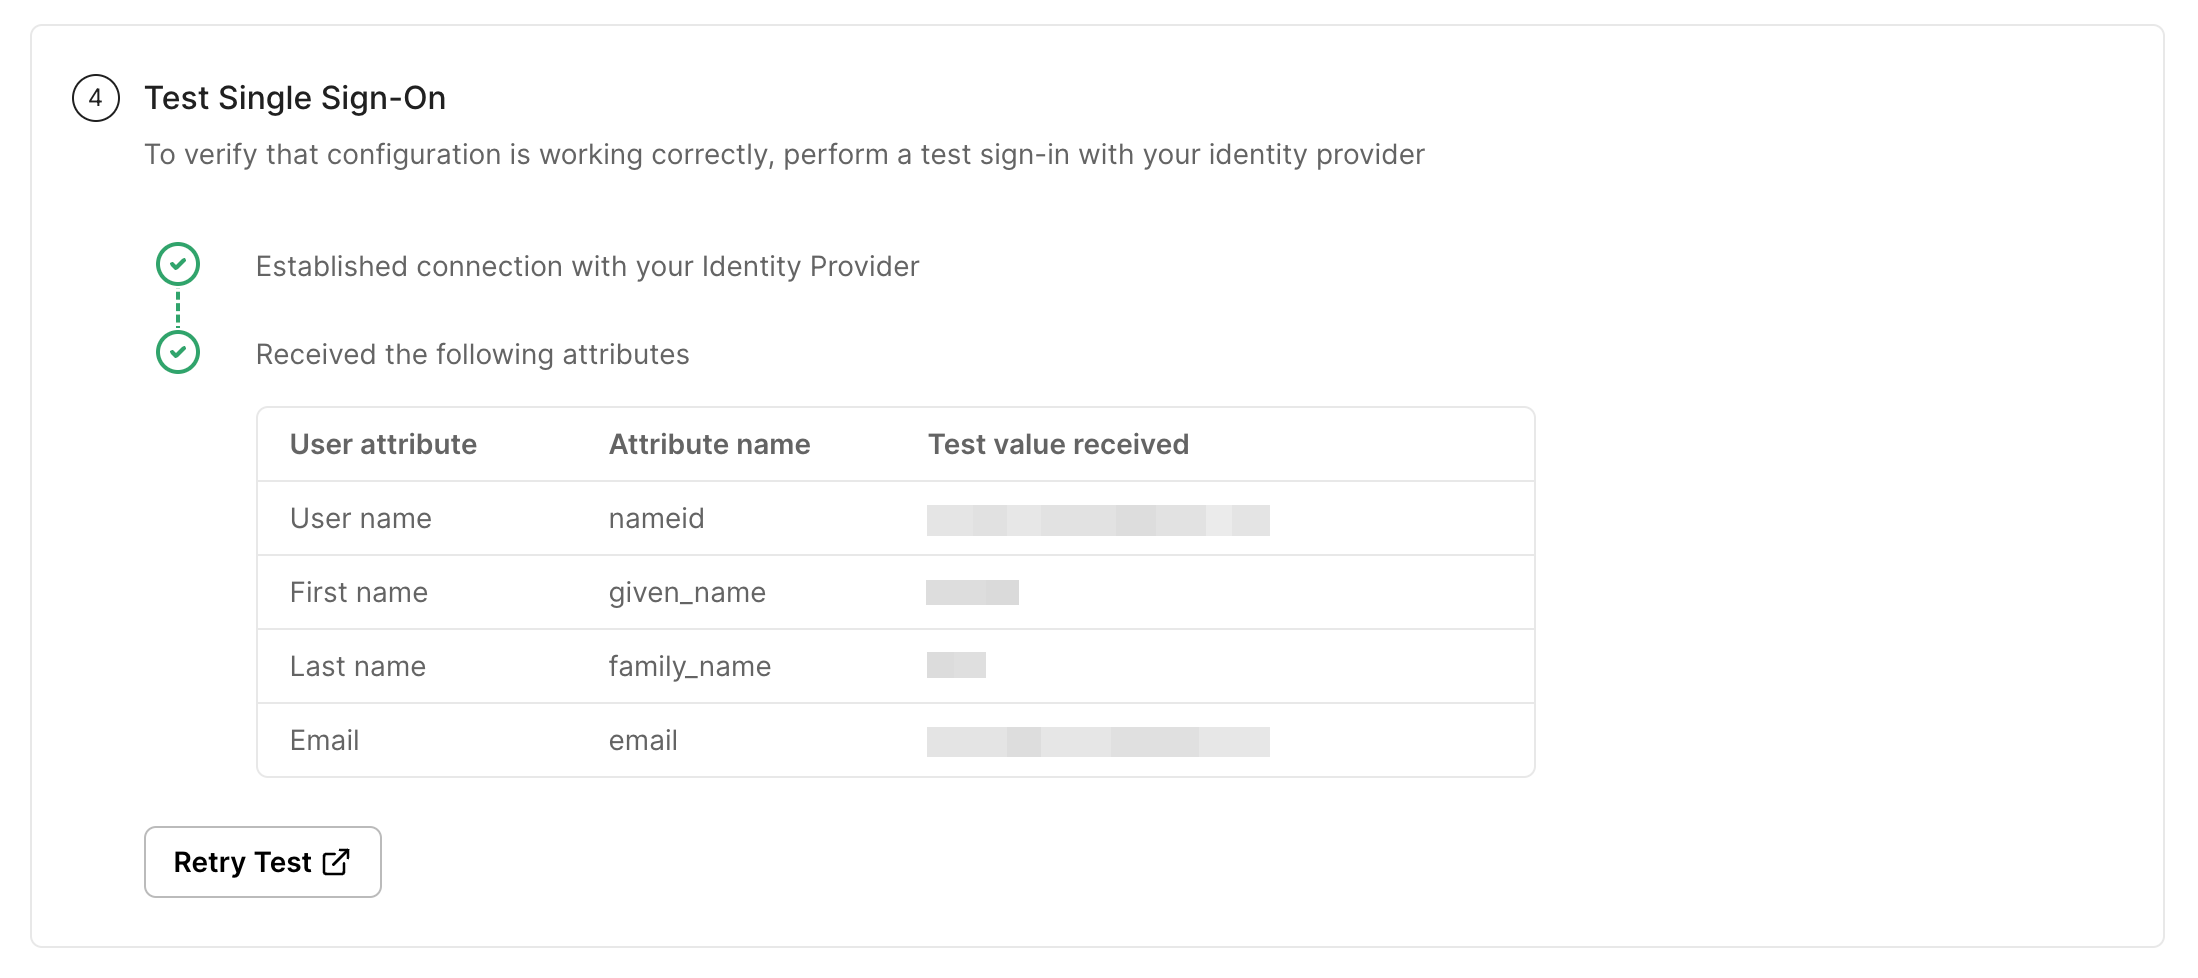
Test the Integration
Section titled “Test the Integration”- In the Admin Portal, click “Test Connection”
- You will be redirected to the AD FS login page
- Enter your AD FS credentials
- Verify successful redirection back to the Admin Portal with the correct user attributes
-
Enable Connection
Section titled “Enable Connection”- Click on Enable Connection
- This will let all your selected users login to the new application via your AD FS SSO
